It is obvious that at the first sign of a problem with your teeth we should go to the dentist and have him check the cause for this problem. Usually the hope that ‘it will go away’ does not come true – and the opposite happens – that things get worse and it might then be too late for a cure.
Tooth ache usually means that the nerves in the center of the tooth – the pulp – are being attacked by an infection. This is mostly caused by a cavity that remained too long untreated so that it penetrated the enamel, the underlying dentin and is now approaching the pulp.
The following illustrations show the progression and treatment of this condition.
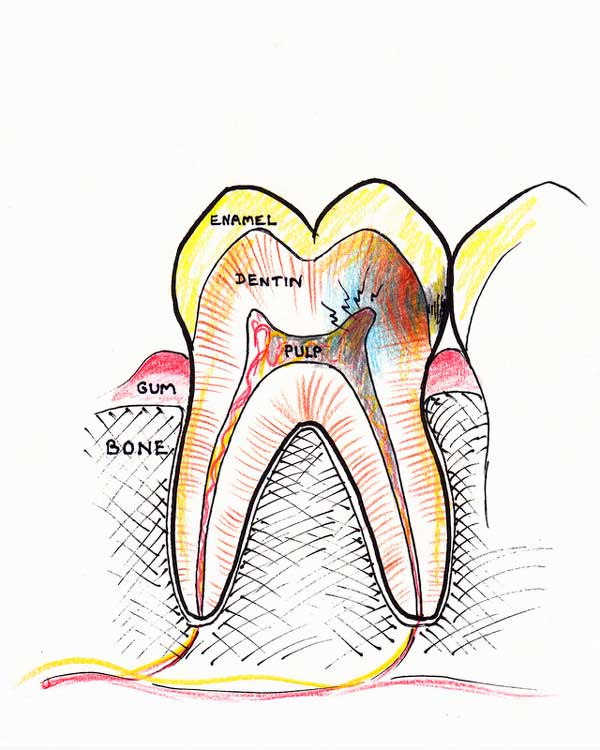
Nerve dying: A cavity arising in a tooth, if not addressed in time, will eventually approach the nerve (pulp) and cause an infection. At some point the infection will irreversibly damage the nerve and cause it to die. Usual symptoms characterizing this stage are pain, pain to hot drinks and throbbing.
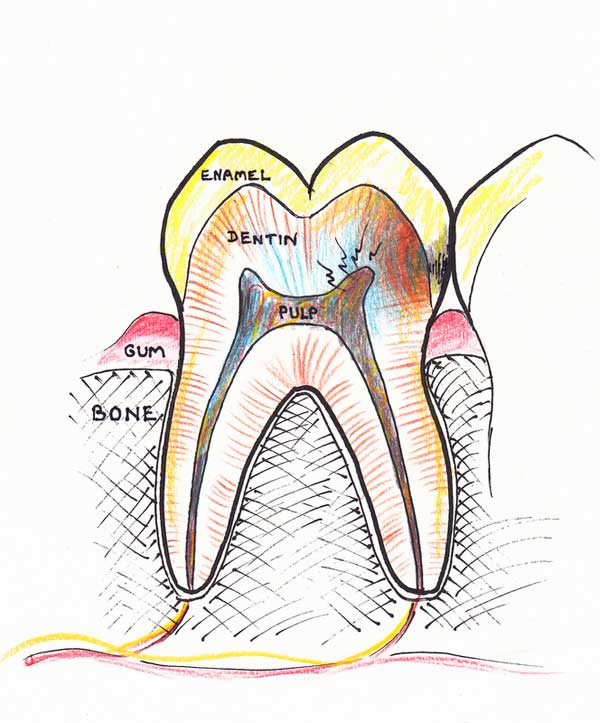
1. The necrosis (death) within the nerve chamber will spread to other parts of the root canals. Soon the whole tissue within the nerve chamber and the canals will die and degenerate into pus or a gangrenous mass.
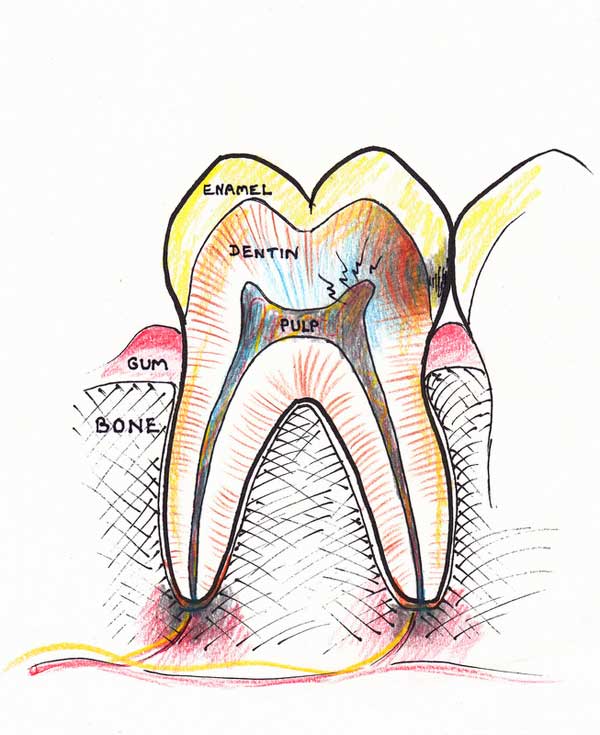
2. The toxic tissue within the canals now spreads out through the small opening at the end of the roots into the bone. A localized bone infection sets in also known as apical periodontitis or local osteomyelitis. The bone at the tip of the roots dissolves away. Symptoms at this stage include throbbing pain and extreme tenderness to touch. Sometimes the tooth feels as if it is longer. This is due to mounting pressure from the pus beneath it that pushes the tooth outwards.
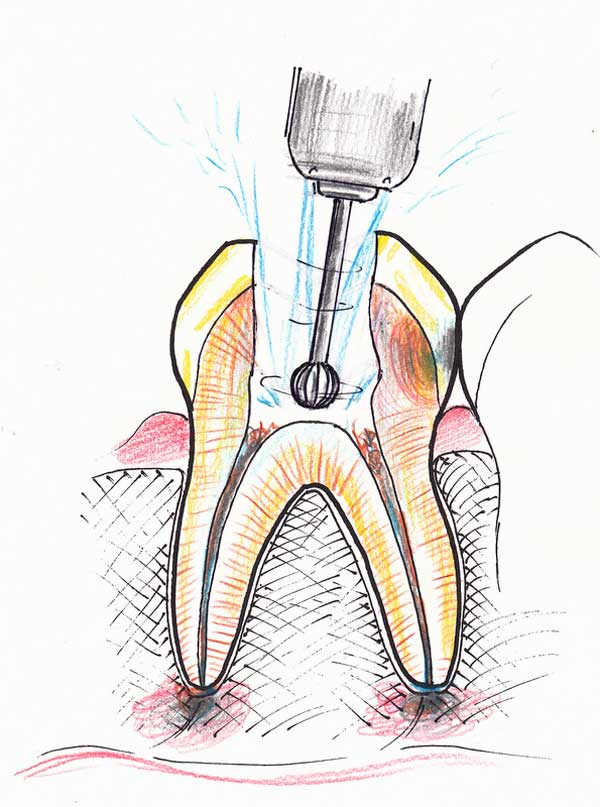
3. Root canal therapy is initiated. An access hole is made and the chamber is drilled out.
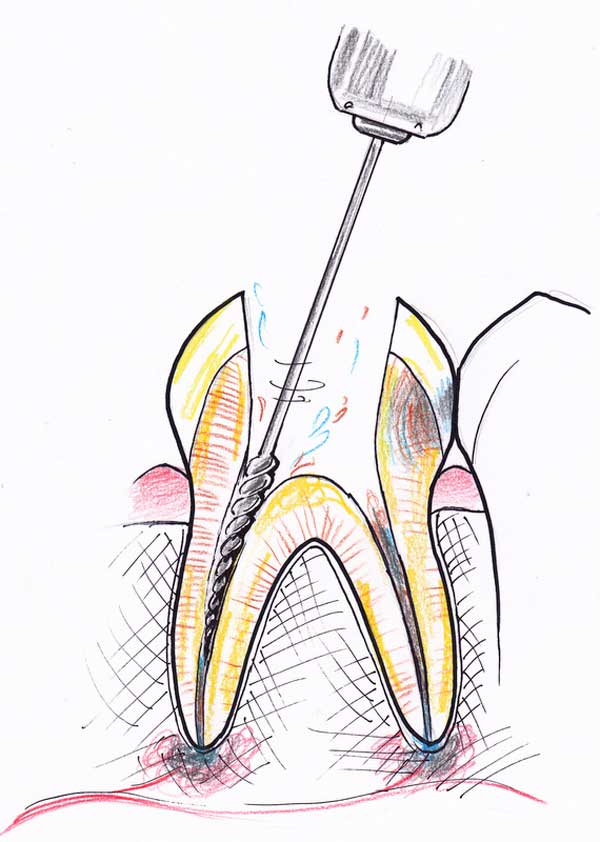
4. Special files are used to clean out the canals and widen them. Disinfecting solutions are used to loosen the dead tissue and kill germs. The canals are widened at least four-fold in diameter to make sure all the dead tissue lining the toxic walls, its recesses and irregularities are removed.
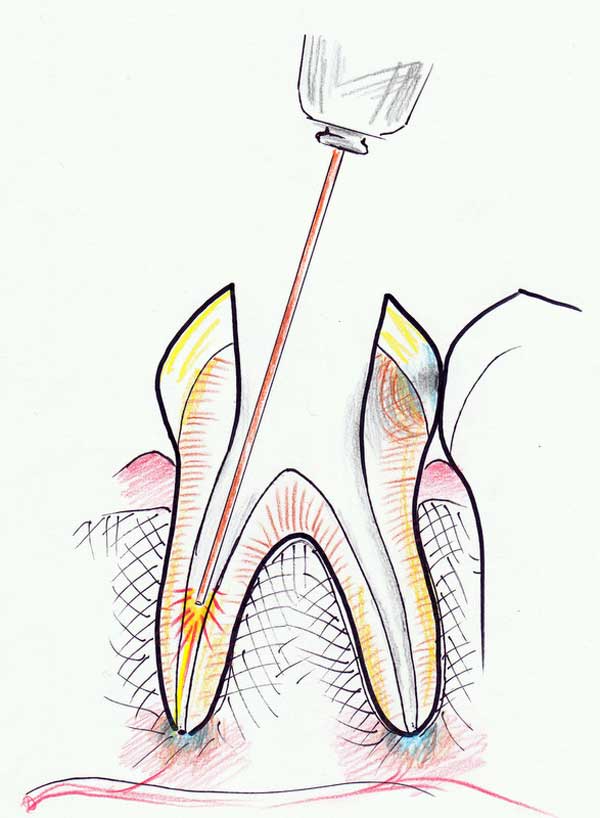
5. A laser is used with a special flexible tip to irradiate the canals and further disinfect its walls.
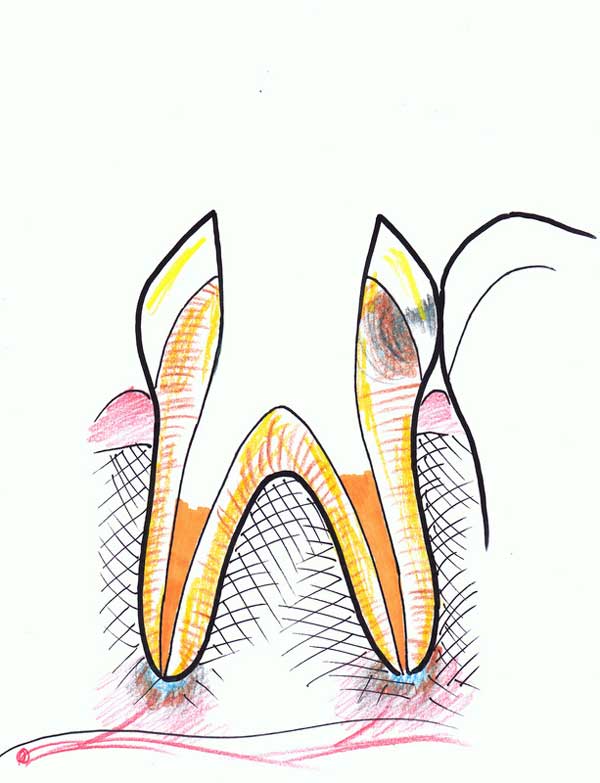
6. After it is disinfected and dried, the canals are filled with a paste that seals the empty space and prevents bacteria from growing.
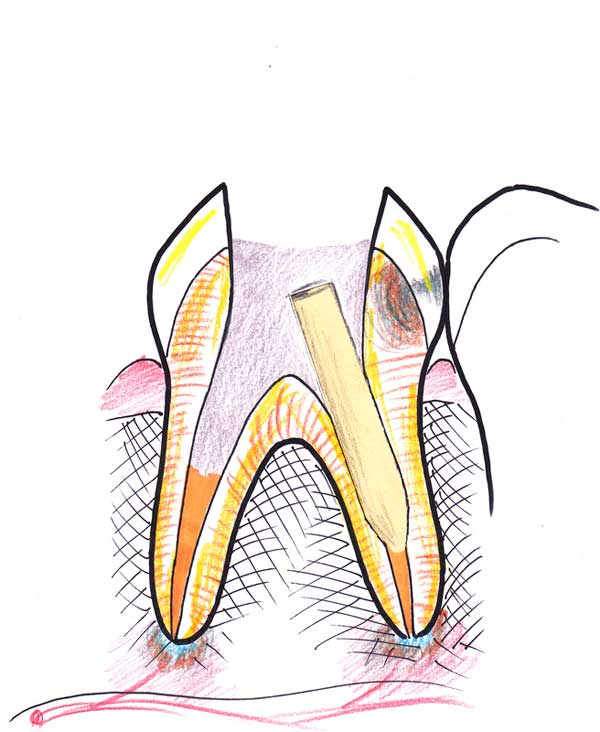
7. After the paste sets, and commonly in a separate session, the top section of the root canal material is removed, and a space is prepared to accurately accept a fiberglass post. This is bonded inside this space with a resin cement, which also fills the void in the tooth and reconstructs the core for the future restoration. This is called “post and core buildup”.
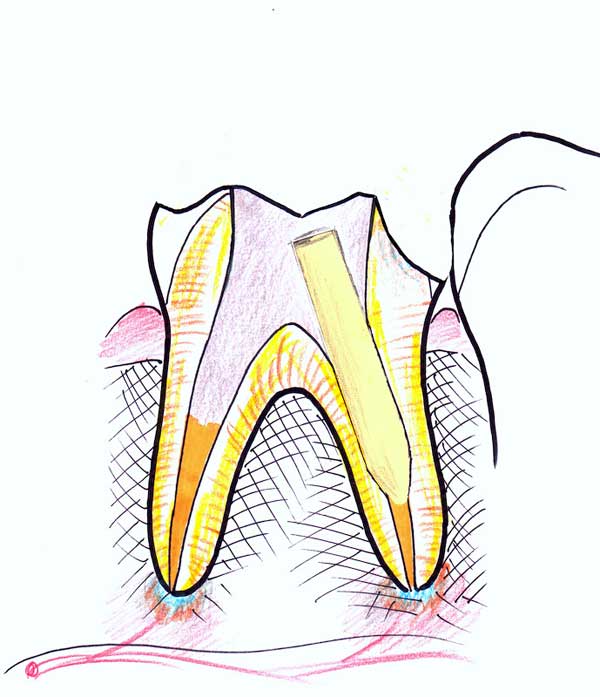
8. The top part of the tooth is now prepared and shaped to accept a porcelain crown or onlay. An impression is taken and the tooth temporized.
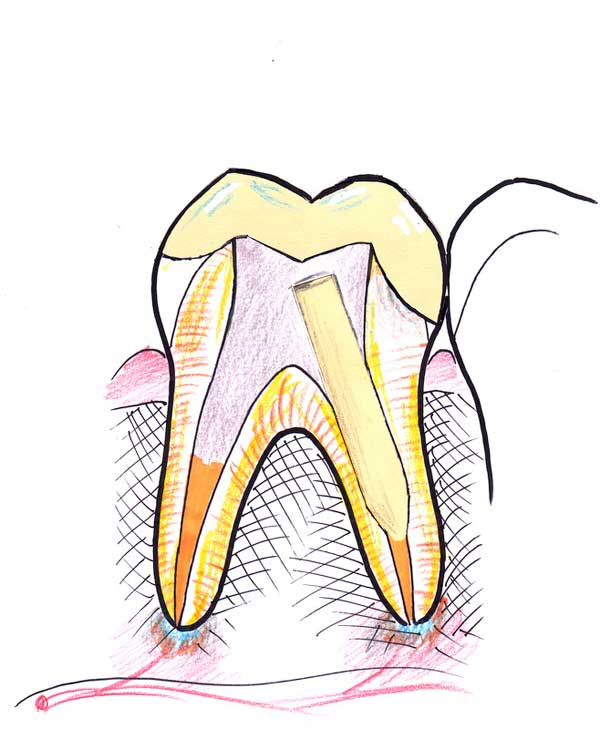
9. In the final session, the tooth-colored porcelain is bonded to the tooth. It is important to understand that the tooth is now essentially bonded from the post all the way up to the top restoration, acting as a single unit, as close to an original tooth as one can get. Therefore the stability and function of the tooth is reinforced.

Very impressive artwork. Well illustrated, Dr.
Thank you!
Thank you!